Finishing touches: porch skirting

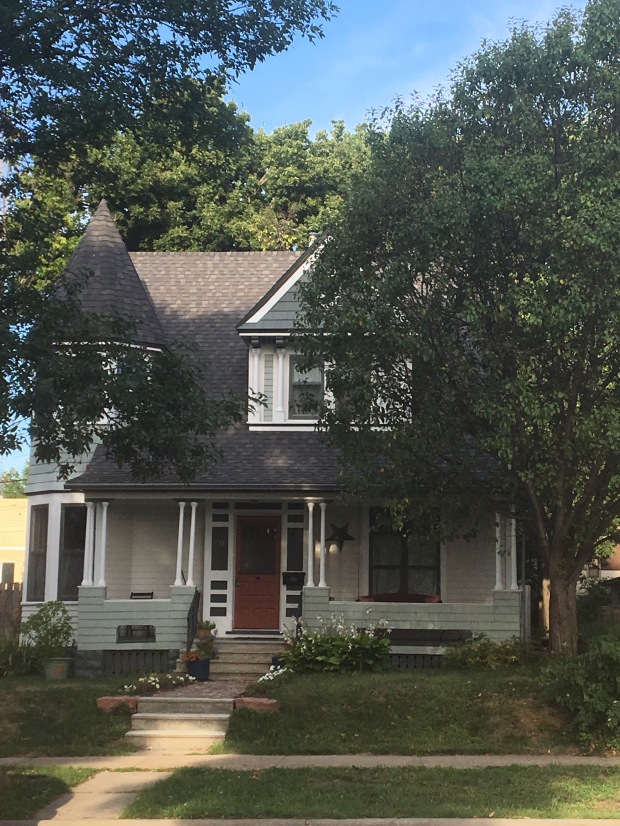
I have yet to post any official “AFTER” pictures of our exterior, because, well it wasn’t DONE.  But now it is, because we finally got around to the porch skirting.  If you’d like to read more about why porch skirting is SO IMPORTANT, please read  this:

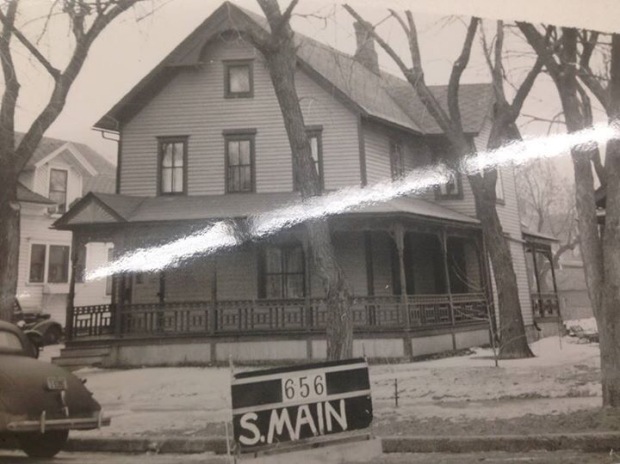
Here is the oldest photo we have of our house, fromt he 1940’s.  Please note the decorative “skirt” below the porch

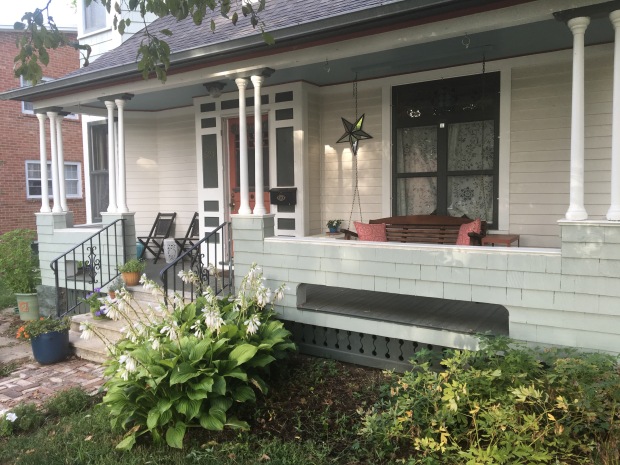
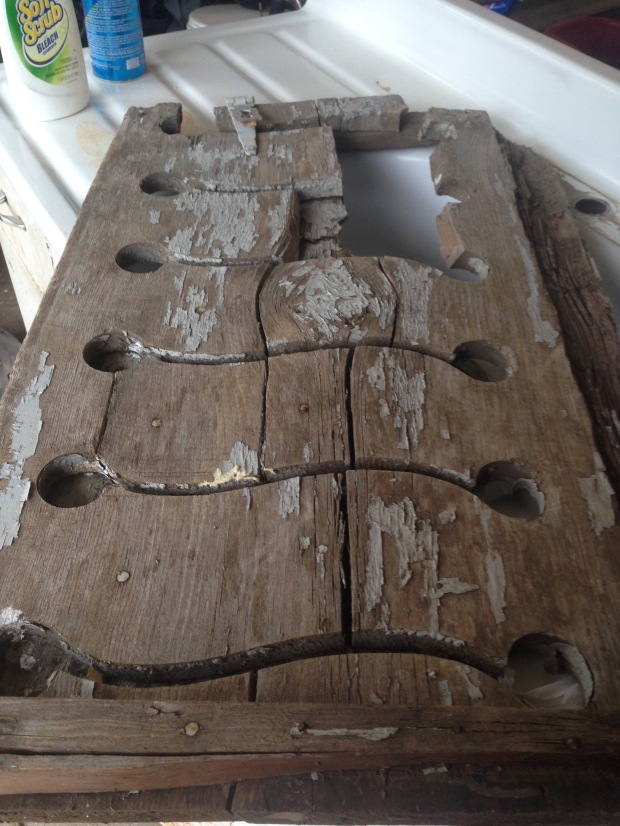
Miraculously, the skirting was still in place when we purchased the house, but in disrepair (duh.. it was 125 years old!)

image

A closer look:

IMG_4279

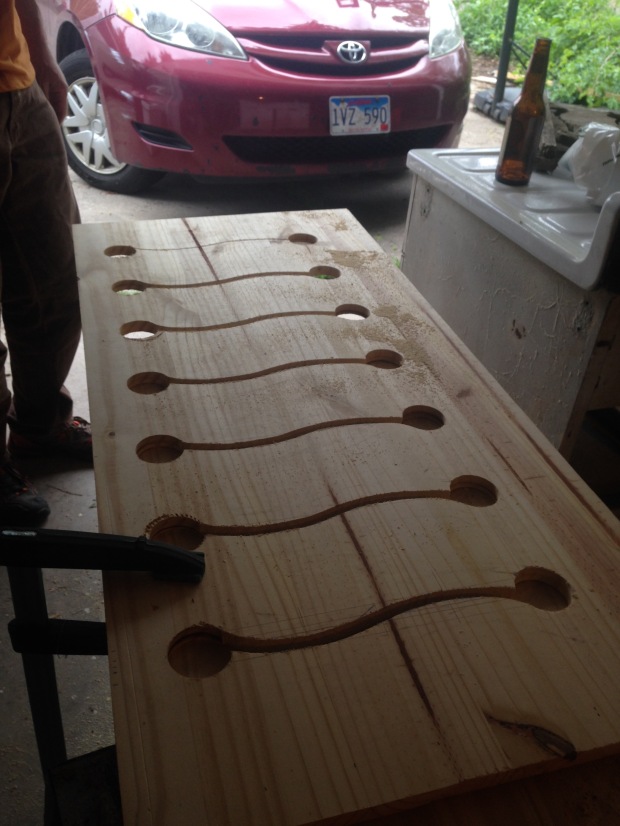
We needed to replace three sections of skirting.  Of course, all were different lengths, and each section started at one width, and ended at another, due to the natural slope of the ground that the house sits on.  This called for some geometry.  And so I called my husband.


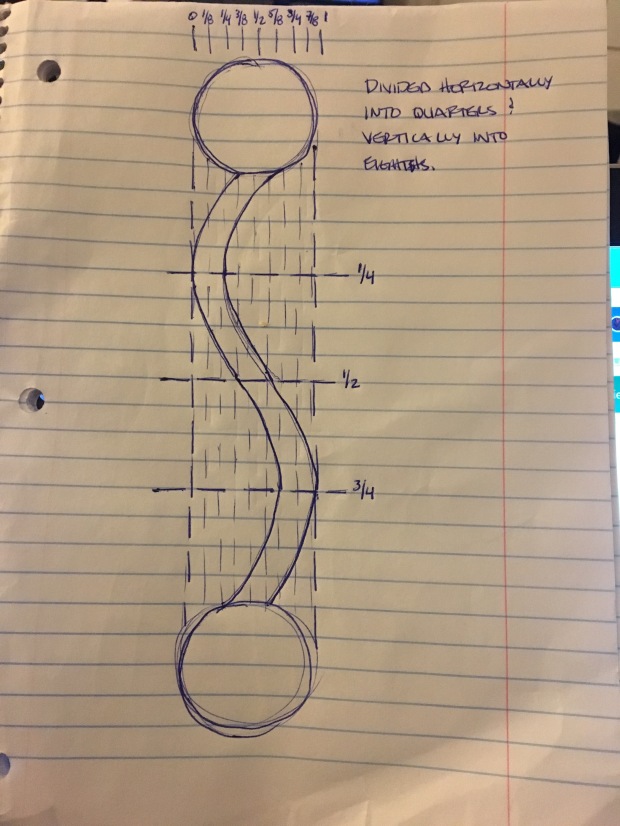
He told me about it once… something about measuring the diameter of the circles, keeping them at the same distance from the edge of the frame, dividing the S curve into quarters, and keeping that curve the same width as the circles… anyway.. here’s a picture of it:

IMG_5050Anyhoo… they turned out pretty great.

IMG_4278

As you can see, this kind of work is best done on a sunny day, in your garage and with a cold beverage of your choosing.  Of course the beverage is sitting on a randome vintage farmhouse sink.  If you are a real old house person, you will have one of these taking up space in your garage.

IMG_4500

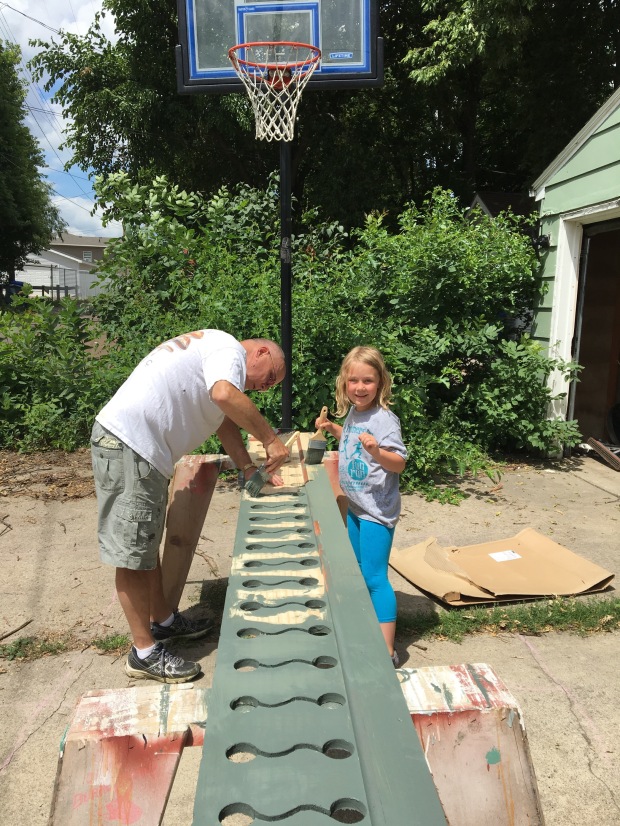
If possible, have your dad and 6 year old do the painting.

IMG_4636

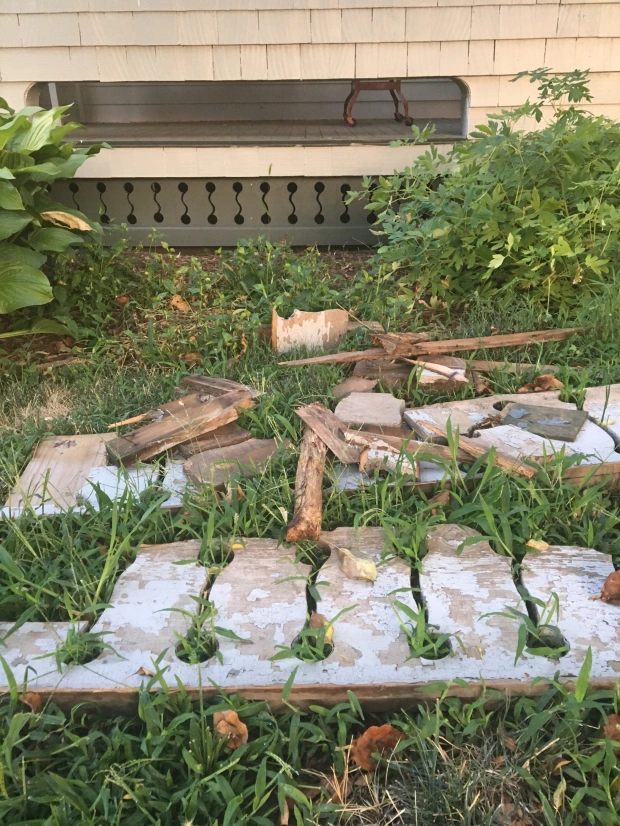
The old and the new.  Both beautiful.  Of course, I am saving the old.  After 127 years, I was not going to be the one to throw them in the landfill.  They will wait up in the attic for the next someone to discover them and marvel at their age and design.

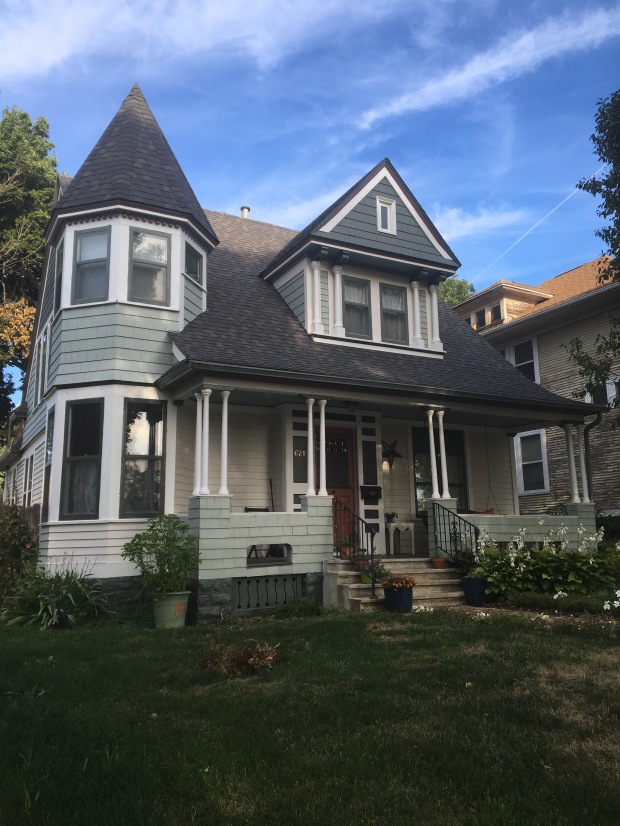
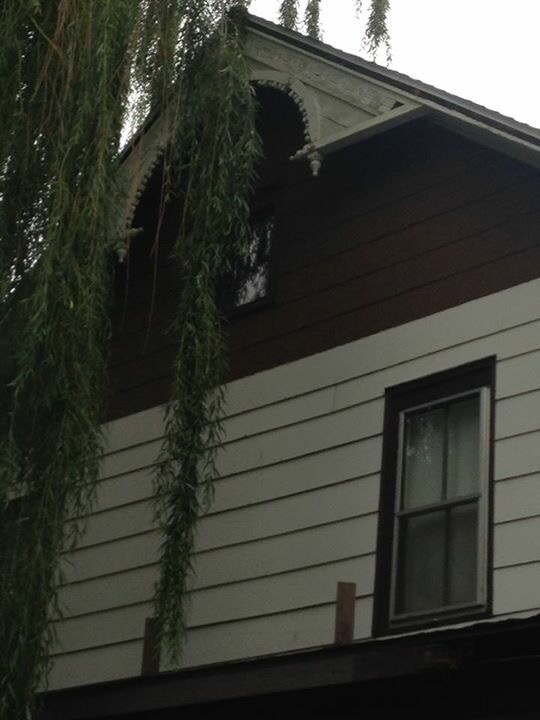
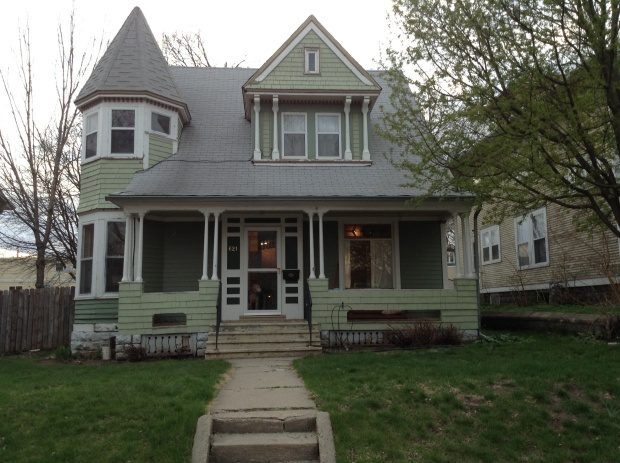
And now, for some after pictures.  You are seeing 18 months worth of painting, a new roof, new cedar shake siding, new tuck pointing, and NEW (historically accurate) PORCH SKIRTING!


One more look at Before… Spring 2014image

After… Summer 2016IMG_5030IMG_5028IMG_5034

      Our New Old House

A month or so ago, we were presented with the opportunity to purchase a house on our block in need of new owners.  The current owner was very ill and unable to care for it any longer.  We saw this as a great opportunity to restore another home in our neighborhood, and also the potential for income, as it has been a duplex for some time, and we would keep it as such.


Here is the house in the 1940s:

IMG_4794

It was built in 1890, I year after ours.  I love to imagine our house, fresh and new in 1890, and just down the street, ground being broken on this one.

Here is the house now:

IMG_4796IMG_4795

You will see many, many details missing, or covered up.  However, the gable fretwork remains, much to my delight.  When we first moved to the neighborhood, 2 years ago, I would run by this house and marvel at this detail.  “This house used to be something beautiful…” I thought to myself.  And it was.  And it will be.


Here are a few shots of the downstairs:

IMG_4502

The walls are all covered in paneling!  The house underwent a renovation in the 70s, and has not changed since.  There is orange carpeting in EVERY room.. yes, even in the bathroom and kitchen.

IMG_4501

If you can see past the paneling and the carpeting, this place has a lot of potential.  There are 3 huge picture windows in the living/dining areas


IMG_4493

The window in the kitchen is non-original, but I do love it.  It lets in wonderful light, and gives a great view of the huge backyard.

IMG_4492

Other than a new floor and paint, there isn’t a lot we will do to the kitchen.  Probably some new pulls for the cupboard.

IMG_4494

Stained glass in the bedroom.

IMG_4505

The view from the landing upstairs.

And here are some shots of the upstairs, where we will be spending our time for now.


IMG_4495

The upstairs has been an apartment for a very long time, but no one has lived here for many, many years.. maybe decades.  Check out this vintage kitchen!

IMG_4504

And a gross vintage bath complete with disgusting red carpet!

IMG_4646

You can imagine that the first thing we did was yank up that nasty carpet.  Underneath- gorgeous fir planks.

IMG_4649

This was so cool.  This was a hidden closet in one of the bedrooms.  It had 2 large closests, and this one was under a curtain.  I didn’t even see it the first time we looked at the house.  When I did notice it and opened the door, I felt like I was the first person to do so in at least 50 years.  It appears this closet used to be a kitchen!

IMG_4648

The larger of the two bedrooms- I love the light in this place.


IMG_4675

The largest bedroom had asbestos linoleum under the carpet.  We plan on getting salvaged fir to match the rest of the house

IMG_4647

Another bedroom- also very good sized.  The owner collected 70s lighting!  This is just a little bit of what I found in one closet!

IMG_4676

A look at the floors in the kitchen.. they are so beautiful!  We plan on refinishing them.

IMG_4787

There was some water damage in the kitchen from an old, leaky roof.  Lucky for us, there is a new roof and no more water damage.

IMG_4788

I just love uncovering the layers of walpaper

IMG_4793

Our reward… uncovering the lost window.  We knew that there had been a 3rd window on the front of the house, but were not sure in what state we would find it.  We are so excited to take off the ugly siding and to show the neighborhood what we found!