Remember Old School??

A little over two years ago, we purchased a Stick Victorian that was undercover.  Here is what it looked like:

img_5112

It was hiding behind a giant Weeping Willow and underneath two layers of siding.  The original columns were hiding inside square columns added perhaps in the 1960s.

One of the happiest moments of our restoration careers was uncovering the original columns and siding:

img_5181

img_5179

IMG_4794

Here is a 1950s photo of the house… Isn’t it crazy what the years can do to a place?

Here is what the house looked like tonight:

In the next few months we hope to replace the missing headers above the windows and paint the house.  We will be adding upper and lower railings, but not sure we will get that done before the snow flies.

We are still uncertain of a color scheme… input is welcome!


INSIDE…

Here are a few BEFORE inside shots:


And here is how it looks tonight.


Demo is done.  The plaster is gone.  The new window sills are in and the old windows will be restored.  Looking at this place all stripped down made me a little emotional tonight.  This is our first big project.  We have spent a ton of time up here, sorting through the old, figuring out what to save, what to change, and how to respect this place and make it shine again.

The drywallers come tomorrow.  It’s time to put the place back together.  Time for a different kind of fun to begin!

The Hall…. is still not done (and other stuff)

Hello!  I guess it’s been a month or four since my last entry and a whole lot of life (not so much house work) has happened since my last post.

Here is a brief run down on the Hall Project:

The two windows have been restored!  Hardware stripped, new sash cords attached.  They now work great and close and latch perfectly, cutting down on the draft.  The only thing that was really wrong with them was too much paint.  I’ll post more pictures at another time, but I have say I never get tired of stripping hardware.  Just look at that adorable little pull showing off its original copper finish.  For decades it was covered in chipping paint.

img_8714

Here you can see that we have started to paint the upstairs trim.  We chose “Gunsmith Gray” from the Williamsburg collection and are so happy with it.  This weekend, I am going to be painting the rest of the trim upstairs.  It is pretty clear that this trim may have always been painted, and probably the second color we found was a really nice gray that we wanted to bring back.

Well, we had finally finished stripping and refinishing the trim along the stairs and around the two windows and doorways in the hall and were so ready to be done.  But then we realized that we really had to strip the doorway at the bottom of the stairs as well.  There was no question that we must.  But we really didn’t want to!  Ugh… stripping wood is so much work.

This time, instead of starting with a stripping agent, we used our heat gun (on the low setting) and got most of the paint off fairly easily.  We used stripper to get the bits remaining, washed with an after strip agent and were ready to sand and shellac.  We found this to be a faster method and will use this approach in the future.  Just look at that pretty doorway framing the entrance to the kitchen.  Man, it was worth every bit of work- ant that photo is before the shellac was applied!

img_8712

After (way) too much thought about paint colors, I went with my gut…. white.  Specifically Benjamin Moore Cotton Balls, which is a very nice warm, creamy white.  I love how the newly refinished woodwork and artwork stand out against it.

img_8713

Looking down… The Moe light fixture is a little eclectic for our old girl, but we love it and paid only $5 for it, which makes us love it even more.


img_8716

The pretty doorway in amber shellac; photo bomb by Hobbes, the cat.

So that’s what where we are with the Hall Project as of this morning.  Hopefully by the end of the weekend, we will have the cap to the baseboard back in place, and I will have two coats of paint on the trim upstairs.

When we haven’t been working on the house this winter, we have been doing things like celebrating Christmas, taking a dream vacation to Disney World with our kids and my parents, and once I even got the whole house cleaned and hosted a Julia Child Themed dinner party!  Enjoy the pretty pictures below!

This slideshow requires JavaScript.


Update- the Hall is not done yet


Here is a quick update on our Hall.

We finished stripping the stairs and had it sanded.  This is what it looked like:

img_8021

Really rough.  Lots of dark nail holes.  We knew that it would be aged in appearance, but we worried that it was so light with such dark defects, that it would look too rustic for our somewhat fancy house.

The type of wood used for the stairs does not seem to be as high a grade as the wood used for the trim.  We think there is a chance that these stairs were carpeted originally, thus there was no need for nice wood.

So the question was… what color to stain the stairs so it would blend in with the trim.  I posed the question to a couple of historic home owning social media sites I belong to and I had one person recommend using “golden oak” stain, and she had photos to prove it.

Golden Oak?

Never!

We tried it.

She was right.

It looked awesome.

Want to see?

Here are photos of after we stained it:

And here it is with 3 coats of oil based polyurethane:

img_2518

img_8027

img_8026

We are so happy.  Look at that beautiful wood!  Can you believe that it was hiding under this?

img_4168


Up next:

  1. Finish sanding the trim on the window and apply shellac
  2. Paint the windows we have removed, put in new sash cords (asap because Winter is coming!)
  3. Paint the trim upstairs
  4. Paint the wall color (but first I have to pick colors!)

One thing leads to another…

When we bought our house, the stairs and upstairs hall were covered in brown short shag carpet, circa 2000.  You can imagine how this kind of carpet looked on the stairs.  It was very worn and of course did nothing for the house.


I have always been a bit puzzled and maybe a tad disappointed that my Queen Anne did not have an impressive stair.  It is just a narrow hall leading up to two small landings.  The only interesting/ beautiful thing about it is the simple, but original hand rail and also the large double windows at the landing.


Finally  I could take the worn carpeting no longer.  I didn’t know what I’d find underneath, but I was convinced it would be an improvement.

It turns out, it was better (through the delusional lens of an old house person), but it still wasn’t good, or pretty.


The steps were painted at least twice (yellow, then grey).  And then for who knows how long, some sort of finish- maybe a wax? was applied in a VERY thick layer.  There was also some purple stenciling on that wax. Someone had tried (and failed) to improve its appearance.  And the staples.  OMG the staples.  Hundreds and hundreds of different models and sizes.  And then there was that one broken step.  Ugh.

One step and one hour at a time, I removed the staples.  I think there were 50 in each step.

Then I waited. A year.

Then I summoned the courage to begin what has become kind of a major project.

My thought process:

-I want to refinish the stairs and hall.

-Then I better paint the baseboards.

-I can’t put ANOTHER coat of paint on these baseboards, I’m going to have to strip them.

-If I am going to the work of stripping them, I might as well restore them with a finish, not paint.

-If I am finishing the baseboards, I better finish the adjacent trim.

-Obviously this is the time to fix/ restore the windows.

-This wax stuff is sooo thick it will burn through way too many sanding pads.  And there is lead paint under there, I don’t want to sand that.

-I guess I better strip the stairs and hall.

-I cannot believe what a horrible, horrible job stripping it (This thought has been a common thread throughout).


img_4170

First small glimpse of what the wood will look like… it was enough to keep me going.

img_7386

A horrible pic, but this shows my method. I applied stripper and then covered with saran wrap and let it sit for a few hours. It definitely helped keep things along

img_7535

Seriously.  What a mess.

img_7541

It’s a mess, but kind of a beautiful one.

img_7537

And once I was near despair, my house threw me a bone.  A sweet little letter A carved into the window sill, disguised by 100 years or more of paint.  Who’s A is this?  I am choosing to believe that little Alvin Ode Delong, born in 1906, who is listed on the 1910 census as living here with his father and grandparents.  I will be carefully stripping this area so as to preserve this sweet moment of boredom/ naughtiness from the past.  Oh how I love an old house and the stories it will tell you if you only take the time to get to know it.

img_7586

I’m not sure how to caption this photo.  Should I say “near then end” or “near the end of my rope.”  I am so close, and yet still so far away from being able to finish this.  At this point I ordered dental picks, and with using stripper on the trouble spots, got to where I can sand.


img_7663

And if I thought stripping paint was messy, I was wrong.  Stripping this wax/ mystery substance is the messiest thing I have ever seen.  This is the goo collected from just two steps.

img_7665

After all that goo was removed, I put another layer of stripper on the 2+ layers of old paint and here is the result.  Not anywhere near done or perfect, but just what I needed to see.

After stripping the entire first flight of stairs and the first landing, I am so very excited for this project to be done.  Not just to be rid of this mess in my life, but to see my dream revealed.

img_7687

Even at this point, the stair way seems SO much lighter and cheerier.  The lines of the planks add texture and interest.   There are details in the trim that I didn’t even know were there before.  The stair treads are beautifully imperfect- cupped and scarred from 128 years of shoes.  I really think my plain and simple stair may soon be all that it was meant to be.

Progress


Wow, it has been a really long time since I last posted on this blog.  I hope my readers will understand that it is because I have been busy doing just what it is that house restoration bloggers tend to do with their time.


Since my last post, we got another apartment ready for rent.  This one is another larger one on the second floor.  This one had a ton of ceiling and wall patching (the previous tenant had anger issues, apparently).  The kitchen is a funny little room.  It was formerly a porch, and so the ceiling is low and the floor slopes downward.  Luckily the previous owners had built in supports to level out the floor.

For months, I drove by my neighborhood antique store’s parking lot where they keep items that are in rough shape.  I think this little upper metal cabinet was there for a year.  I finally realized it would be perfect for the kitchen.  Because the ceilings are so low, we could not have tall cabinets.

img_6590

The floors had to be pulled up- think disgusting 70’s linoleum that hadn’t been mopped in 10 years.  We used these commercial floor tiles from Menard’s.  They come in a variety of colors but we decided to stick with neutral for the apartment.  They are super heavy duty and soooo cheap!  We love how they turned out and plan to use them in our own kitchen (hopefully within the next year)!

img_6628

img_2105

The sink came from the same parking lot!  It was NOT a steal, largely because of this brass faucet.  All that we had to do to this was clean it- we even kept the paint!

The metal lower cabinet came out of another old house that we own.  Originally I assumed I would try to remove the rooster decals ( I think they are from the 30s-50s?) but then time did not allow for that, and I actually think they are adorable and tie in to the green under the sink.  I have no idea if our 20 something male tenant shares that sentiment!

img_6630

The rest of the apartment is fairly comparable to the others.  The floors on the upper level had been under multiple layers of plywood and carpet, and so were in perfect condition!  We sanded them down and put on new polyurethane.  Gorgeous!!  The light fixture is circa 1940s.  The fixture was covered in paint, was stripped and cleaned and looks just right in this space.

img_7013

And back at the homefront, I began the long and crazy process of stripping paint off the trim and baseboards in our stairwell.  I am trying to decided if I just want to get it to the point where I can sand and put on a fresh coat of paint (there are currently so many layers that a lot of the detail has been lost), or if I want to go full out and get them to the point where they can be the original wood.  What you you all think?  How can I do this?  Any tips?

We are close to having the 4th and final apartment next door finished and rented out.  And then we will turn back to fixing up the exterior of Old School so that it can be painted (we hope in October).  Lots of work ahead, but it will be fun to be doing it out of doors this time of year.

Transforming Scary apartment #1

Here are a few pictures of Scary Apartment #1 AFTER the gross, not-vacuumed ever carpet was removed and after the exterminator made the first of his three visits.

When we first saw the apartment, it was quite overwhelming.  It was so dirty and smelled so bad.  Every inch was nasty.  I wanted to give up.

img_5852img_5853img_5854

What we had to deal with :

  • severe tobacco residue on all walls and ceilings.
  • Multiple broken windows
  • Lots of dirt and grime.  I don’t think this place was cleaned in the last 3 years that the tenant lived there.
  • Gross flooring.  The linoleum in the kitchen and bath were disgusting, and the narrow oak flooring (non original) was water damaged, and sanded beyond saving.
  • Horrible bathroom conditions- broken tile, chipped tub, lack of a real shower.

What we did:

  • Took everything out.  The kitchen cupboards we saved.  The tub we saved.  Everything else went.
  • Hired a professional cleaning company.  It took them about 16 man hours to get rid of the tobacco residue.
  • Painted all walls and ceilings with Kilz.  What a pain, but got rid of 100% of the smell and prevented tobacco stain bleed through
  • Layed new hickory flooring.  We layed the floors, but had them professionally finished.
  • Painted all walls Edgecomb Grey by Benjamin Moore.  We painted the trim Alabaster by Sherwin Williams.
  • In the bath, we used the original tub, but added a real shower head and subway tile surround.  The sink is an old one we picked up awhile ago, and the best thing about it is the original custom cabinet that came with it!  I this tiny space, storage is key!  We also reused the old medicine cabinet.  I painted it in kilz and then finished in an enamel paint
  • In the kitchen, we bought 20″ appliances.  We cleaned the cabinets with TSP, painted with Kilz, and finished with Alabaster semi gloss paint.
  • The sink and cabinet!  My favorite part.  We have had this in our garage for a year.  It was really rusty, but we put a steel brush attachment on our grinder and got it down to bare metal!  I primed with “stix” primer, and finished with high gloss enamel paint by Sherwin Williams, also in Alabaster.  I can’t believe how amazing it looks.
  • Also my favorite..  the salvaged French doors!  We found them on a swap site and they happened to be the perfect size for the doorway between the small living room and bedroom.  The veneer was cracked and peeling.  We did a lot of gluing, clamping, and sanding.  I primed them with “Stix” primer and painted with semi gloss Alabaster.

And after ALL of that, here are the after pictures!

FullSizeRender_4[1]FullSizeRender_3[1]IMG_6262[1]

FullSizeRender[1]FullSizeRender_8[1]

IMG_6258[1]FullSizeRender_12[1]IMG_6278[1]FullSizeRender_6[1]FullSizeRender_13[1]

I don’t think this space could have been more disgusting when we started.  And now it is such a clean, bright and beautiful spot for someone to call home.   I’m so glad we didn’t give up on it.

A freshened up Hall

Recent wallpaper-themed posts by two of my favorite boggers (Ross and Amy) reminded me that I never recorded the freshening-up of the Hall in Old School.


Here is the hall when we purchased the house:

img_5253

Here is a better look.  We removed the carpet and found brownish black old linoleum.  

The first step (after emptying if of all the STUFF) was to scrub the walls.  The walls had been skim coated many years ago (I’m thinking 50 years ago) and this was separating from the walls in many spots.


I wasn’t looking forward to the task of scraping these parts off, but my attitude improved considerably when I started to uncover wallpaper!!

I think this silvery pattern may be the original paper.

  Next came this fabulous, bold red pattern!

IMG_5724

IMG_5728

It was so much fun imagining this pattern and color wall to wall, greeting the family and guests upon arrival.

The next layer is my favorite:

IMG_5727

IMG_5725

I think this pattern would be lovely today. I wonder when it was put up… I am thinking possibly in the 1920s or 30s.  

After making sure to take lots of pictures, and saving the large scraps of papers as keepsakes, I another skim coat on the walls to even them out.


I painted the walls the same color as the main level, “Dorian Grey” by Sherwin Williams.

We also added a pendant light and shade that we found in the basement (rewired of course).  I think there is a chance that this is where it started out in the first place.

We added a parlor table found in the basement and it there you go- a freshened up hall.

Apartment #1 is ready!

We are ready for our first tenants at Boarding House to move in!  Here are the before and afters of the first apartment we tackled here.

img_5054

this shows the apartment the day we bought it. dingy carpet, ripped old linoleum, brown, tobacco stained cabinets

img_5936

And here it is now. we painted the cabinets Alabaster by Sherwin Williams, polished the chrome hardware and chrome light fixture. we knocked out the counter separating the kitchen and living room, which made it possible to add a full sized gas range.


We were amazed at how beautifully the original chrome cabinet hardware shined up

Wall color is Edgecomb Grey from Benjamin Moore.

This is the living room. the narrow oak we found under the carpet was in tough shape and did not have enough thickness left to refinish.


Instead we installed “cabin grade” hickory.  It was only about $1.25/sq foot!  We stained it and had it professionally finished.
Last but not least… the lovely bathroom.  All we had to do in here was subway tile around the tub, add a shower attachment for the faucet, and paint the walls.  The mirror and light were already there and just needed to be polished and cleaned.
This space is not fancy, but it is clean and bright and will make a great space for someone to call home.

May I Present… the “Boarding House”

With a tenant securely in “Old School”, we were able to turn our eyes to taking care of what we have affectionately named the “Boarding House.”  This house sits right next to ours, and since we moved in three years ago, has been a source of heartache.

img_5096

This house was built in 1919, 20 years after ours.  It makes me wonder if it replaced a smaller dwelling, or if it was the first house built on the lot.  It was constructed as a single family home, but quickly became lodging for borders.  Based on the presence of 6 electrical meters, it remained a boarding house, with all 4 bedrooms upstairs rented out, sharing a bathroom, until the  not-so-distant past.  Currently, it is has 4, 1 bedroom apartments.

Back to my achy heart.   It had not been loved in decades.

img_3179

I would look at it daily and yearn to own it and take care of it.  I could see what a beautiful house it once was, and that it could easily be again.

When it came on the market in late summer, it was the last thing we needed- adding another house to take care of to our plate.  But in my mind, it was already mine.  It needed me to take care of it, to make sure that it was lovingly restored, not torn down, or made to look like some sort of cardboard box.

img_1658

img_5054

Inside, it was a bit underwhelming.  But there were windows!  And cool trim!  And old door knobs!

The photo above showed a vacant and relatively clean apartment.  The one below shows one of the dirty ones, after we took everything out.

img_5854

This was the worst one- lots of tobacco residue and grime.  We hired it professionally cleaned.  We plan to paint all surfaces with oil-based KILZ before painting.

img_5852

Yikes

img_5853

Double Yikes

So there was a lot of ugly in this place, but there was also… this staircase.

img_1651

And there were these floors hiding underneath the layers of carpet and old linoleumimg_1731

And the basement was full of cool stuff!img_5995img_6004img_6005

img_5855

Anyone know what this is???

img_5857

img_5859

We are going to use this inside the foyer as a place for tenants to deposit their rent.  I am assuming it was the original mailbox.

img_5861img_5863

So, we took a deep breath and dug in.  And just like that, it started to look beautiful again.

img_5906

img_5322

Pocket Door Detectives

Before we move on from Old School,  I want to tell the (long) tale of the Pocket Door Saga.

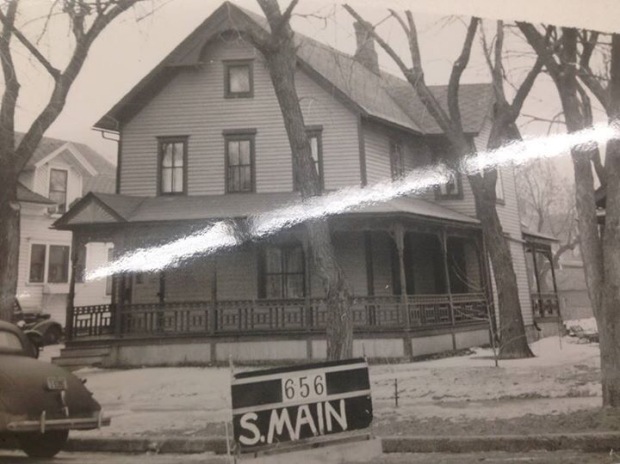
See, we had these beautiful pocket doors with original hardware that separated the dining room from the bedroom in the main level apartment of the house.  The people we bought the house from, whose 90 year old father had lived there since 1965, and whose grandmother had lived there before that, never remembered them being used!  As far as we know, they had been stowed away in the walls for the last 50-70 years!  Gah!  What a waste!

When we tried to shut the doors, one side glided perfectly, but the other door did not.  This needed to be fixed, because the pocket doors separated the bedroom from living areas of the 1 bedroom apartment.  BUT HOW???  As far as Lance could tell, the only way to get the door down to be worked on would be to take off the trim/ knock a hole in the wall… which we DID NOT want to do.

img_5914

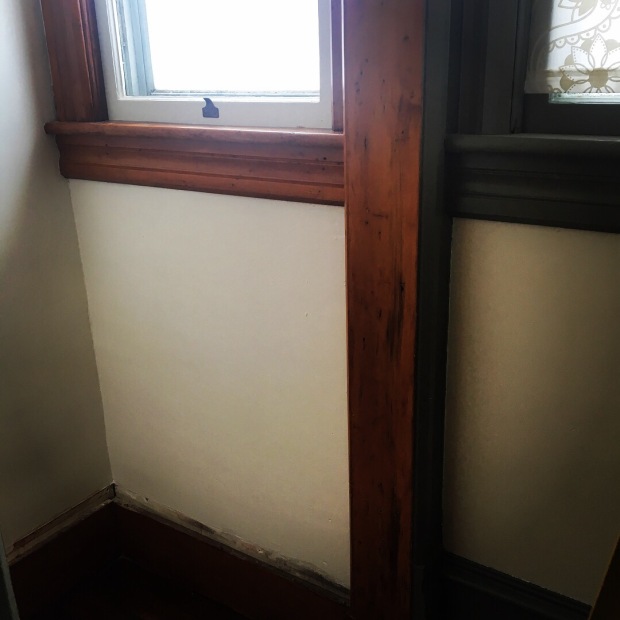
The problem door.  Notice how something has been gouging the woodwork as it slid 😦

It was then that I gave thanks for the wonderful World Wide Web.  For it is there, on Ross’s blog, I had read about his similar battle with his beloved pocket doors.  And I remembered that there existed someone who could help me.  Stephen, based out of Boston, is an expert in the art of fixing pocket doors, and was remarkably willing to help us via a LOOOOOONG series of emails and text messages.

When I say long, I do mean looooooooooooooooooooooong. Over about a week or more, he and lance were in almost continual contact trying to figure out how to release the broken pocket door from the grips of the mechanism that held it in place.

img_5912

We took a million photos like this, trying to get to the bottom of the problem.

Essentially, the drama escalated because what Stephen assumed was the hanger that we had was not what it actually was, and so his advice didn’t work for us… at first.  Finally, Lance turned the flashlight on his phone, stuck it up into the pocket door abyss and waved it around with the video camera recording who-knows-what.  It was through these videos that Stephen caught a glimpse of a small decorative detail on the hanger that told him exactly what kind of hanger we had.  It was a rare hanger, but he knew (because he KNOWS these things) what we needed to do to get the pocket door released from this particular hanger.  After he gave Lance the necessary instructions, and after Lance bought a telescoping magnet to help him, the pocket door was fixed and gliding like butter!

Our elusive hanger… it’s a “Scissor type!”

img_5911

Now, ISN’T THAT AMAZING????

Know what else is cool?  The pocket door at our own residence has the same hanger.  Which is kind of amazing, and yet not that amazing, since our house was built 1 year before Old School, is a half block away, and Sioux Falls was a small town that probably had  a limited number of pocket-door hardware suppliers.  But thinking about that gives me a little thrill.

I am so grateful for other old house bloggers (Ross is one of the best) and especially for Stephen.  Without them, I’m not sure what we would have done.

And now, for your reading pleasure, I wanted to share one of the last email correspondences between the Pocket Door Detectives.

“Hi. As a result of watching your video where the camera was overhead the tracks!! … I see that you do not have the hedgehog hanger, but have instead this ‘scissor type’ E. C. Stearns cast iron hanger.

Same time frame, of course.

There must be a better way for me to describe this hanger, having parallel articulated arms? Can you

think of how to describe that assembly?

Anyway, the point is – that this hanger was fitted out/was designed in a way that … there is no
internal threading built into the hanger body! Instead the internal threads … where we want the adjustment screw to go … are found in a crosswise nut.

In today’s parlance, a crosswise nut is known as a ‘barrel nut.’ And this is used widely in

knock-down furniture. 🙂

SO, the reason you were no able to find any internal threads … when you were extending your 5/16″ threaded rod is – apparently the crosswise nut has fallen out.

I WILL HAVE TO LOOK AT THE VIDEO AGAIN, but I did see the parallel articulated arms briefly in the video

The next thing is for me to go back and see if I see the crosswise nut.

Good going on the video! (Breakthrough in the hunt!)”

I so appreciate people who are passionate about what they do, and Stephen is one of those people.  Thanks, Stephen!